学習環境
プログラミングを学習にするあたって初めにぶち当てる壁が学習環境の構築だと思われます。
やり方は色々ありますがここではVirtualBoxとVagrantを使ったLinuxの環境構築を行っていこうかと思います。
VirtualBox とは
まず、VirtualBoxとは?となると思うのですが、これは仮想マシンを作成するソフトウェアのことです。
さらに仮想マシンって何?となると思うのですが、これはOSの中に作られた仮想的なOSのことです。
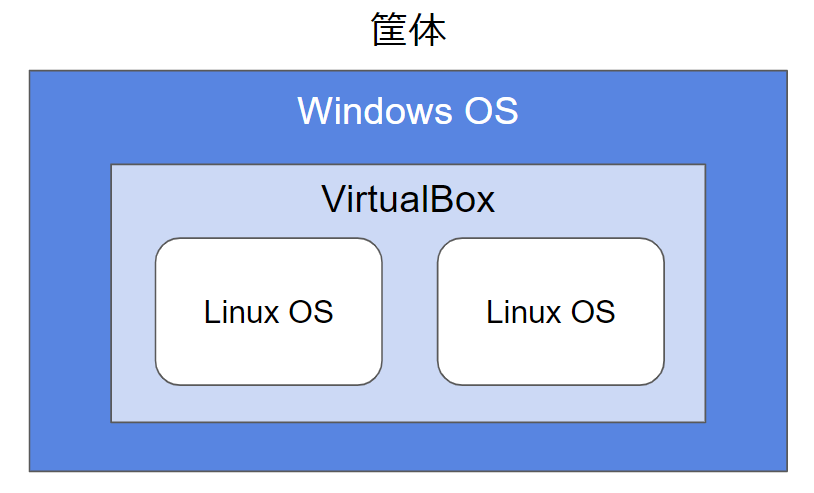
まったくの無知の頃は、OS=物理PC と思っていたのですが、そうではなくOSは人間で言う脳、物理的PCはただの箱つまり体みたいなものかなと。
なので、仮想マシンはPCの中にPCがあるイメージ。
仮想マシンに与えるリソースは、物理的なPCのリソースに依存するので、性能が低いPCでは数台仮想マシンを立てただけですぐにリソースがパンクする。
下記画像は仮想マシンのイメージです。

Linux環境を準備するうえでとても頼もしいVirtualBoxですが、仮想環境を作成する際の設定に関してはちょっとめんどくさい。そこで登場するのがVagrant!
Vagrant とは
Vagrantとは、VirtualBox で作成する仮想マシンをファイル一個準備するだけで自動で作成してくれる便利ツールです。
VirtualBoxのみで仮想マシンを準備しようとすると、ISOイメージを準備したり、IPアドレスの設定、ストレージの設定、SSH設定などを毎回設定をする必要があります。
Vagrantでもこれらの設定は必要なのですが、Vagrantfileと呼ばれる専用の設定ファイルに記述するだけですぐに仮想マシンの作成ができるようになっています。
Vagrantfileはテキストなのでコピーして一部設定を変更するだけで、もう1台の仮想環境をすぐに作成できたりしてとても便利!
そして、Vagrant Boxよばれる(単にBox、Boxイメージと言ったり)こいつが仮想マシンを作成する際のOSテンプレート(ファイル)になります。
様々なBoxが準備されているのですが、使用するBoxによってCentOSやUbuntuと言ったLinux OSの種類を指定することができます。
百聞は一見にしかず!といことで実際に仮想マシンを構築してみましょう(^_^)/
VirtualBox インストール
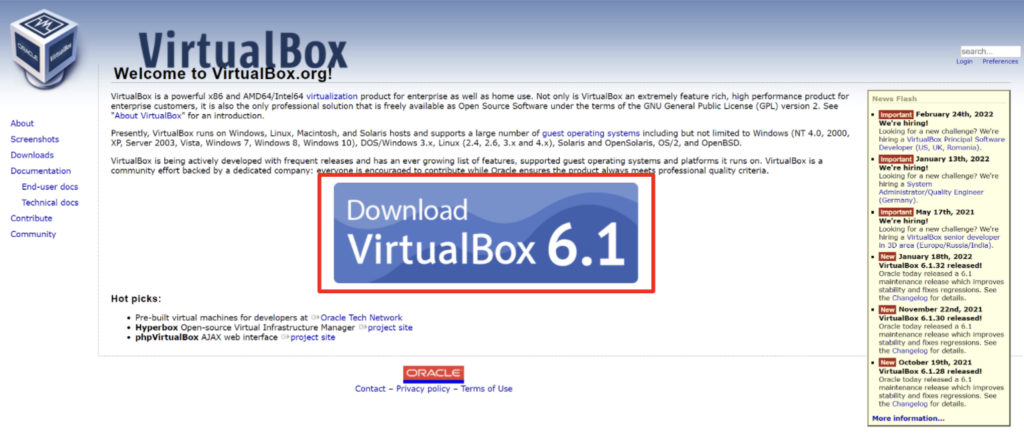
こちらのURLにアクセスしVirtualBoxのインストーラーをダウンロードしていきます。
https://www.virtualbox.org/
画像のマークした部分をクリックします。

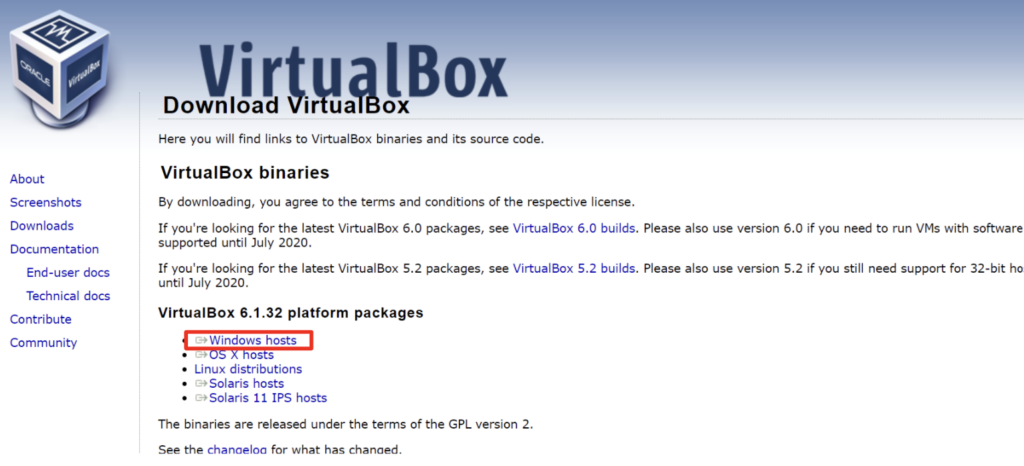
インストール対象がWindowsなので「Windows Hosts」をクリックします。
するとインストーラーがダウンロードされるかと思います。

ダウンロードされたインストーラーを開き「Next」で次に進みます。
一部手順は省略しますが、基本的には「Next」または「Yes」で先に進めてください。

ある程度進めると「Install」が始まります。

インストールが終わりましたら「Finish」で終了させます。

するとデスクトップにアイコンが作成されるかと思いますのでそちらを開きます。
このような画面が表示されればインストール完了です。

Vagrant インストール
続いてVagrantをインストールします。
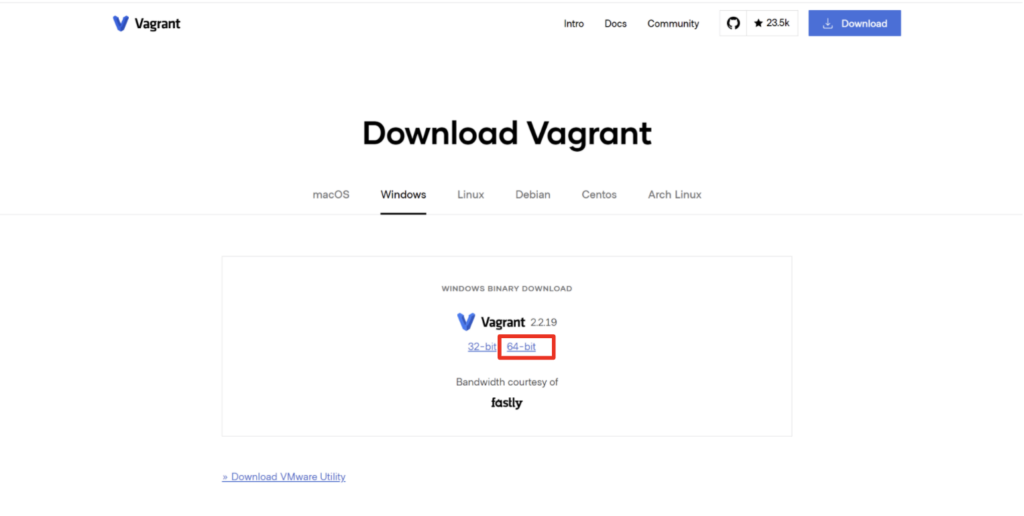
こちらのURLにアクセスし、マークアップした箇所からインストーラーをダウンロードしてください。
https://www.vagrantup.com/downloads

こちらも同様に特に設定を変更する必要がないので「Next」で次々進めていきます。

ある程度進めると「Install」が始まります。

インストール完了したら「Finish」で完了します。

Vagrantの設定を完了させるにはインストール後に一度PCを再起動させる必要があるので「Yes」をクリックします。

再起動が終わりましたら、Windows標準搭載のPowerShellを開きます。
手順:Windows画面左下「スタート」>「Windows PowerShell 」>「Windows PowerShell 」
その他のコマンドラインインターフェイスを使っている場合はそちらでも構いません。
Vagrantがインストールされたかコマンドを打って確認してみます。
以下のようにバージョンが表示されれば成功です。
※インストールした時期によってバージョンは異なります
PS C:\Users\USER> vagrant -v
Vagrant 2.2.19
仮想マシンの作成
Vagrantを使って仮想マシンの作成を行っていきます。
まず、管理しやすいように仮想マシン用のディレクトリを作成します。
この操作はコマンドでもできますが今回はエクスプローラーを使って行います。
「C:\Users\USER」配下に「vm」(なんでもいい)というディレクトリを作成して下さい。
※USERは人によって変わります。
作成したらPowerShell側でそのディレクトリに移動します。
PS C:\Users\USER> cd vm
PS C:\Users\USER\vm>
仮想マシンに使用するBox(OSイメージ)を準備します。
今回はCentOS7で仮想マシンを作成しますが、この操作は初回のみの操作となります。
別途OSを利用したい場合は同じようにBoxを準備する必要があります。
C:\Users\USER>vagrant box add centos/7
==> box: Loading metadata for box 'centos/7'
    box: URL: https://vagrantcloud.com/centos/7
This box can work with multiple providers! The providers that it
can work with are listed below. Please review the list and choose
the provider you will be working with.

1) hyperv
2) libvirt
3) virtualbox
4) vmware_desktop

Enter your choice: 3
==> box: Adding box 'centos/7' (v2004.01) for provider: virtualbox
    box: Downloading: https://vagrantcloud.com/centos/boxes/7/versions/2004.01/providers/virtualbox.box
Download redirected to host: cloud.centos.org
    box:
    box: Calculating and comparing box checksum...
==> box: Successfully added box 'centos/7' (v2004.01) for 'virtualbox'!
ダウンロードされたBoxを確認します。
以下のように表示されれば無事にダウンロードできてます。
PS C:\Users\USER\vm> vagrant box list
centos/7 (virtualbox, 2004.01)
続いて作成したディレクトリを初期化しVagrantfileを作成していきます。
PS C:\Users\USER\vm> vagrant init
A `Vagrantfile` has been placed in this directory. You are now
ready to `vagrant up` your first virtual environment! Please read
the comments in the Vagrantfile as well as documentation on
`vagrantup.com` for more information on using Vagrant.
ディレクトリの中を確認するとVagrantfileが作成されているかと思います。
PS C:\Users\USER\vm> ls
    ディレクトリ: C:\Users\sssmg\vm
Mode                 LastWriteTime         Length Name
----                 -------------         ------ ----
-a----        2022/03/19     13:58           3080 Vagrantfile
作成されたVagrantfileを開き既存の設定を全て削除した後、以下の記述で上書きします。
# -*- mode: ruby -*-
# vi: set ft=ruby :

Vagrant.configure("2") do |config|
  config.vm.box =  "centos/7"
  config.vm.provider "virtualbox" do |vb|
    vb.memory = "2048"
    vb.customize ["modifyvm", :id, "--natdnshostresolver1", "on"]
  end

  config.vm.define "test1" do |test1|
    test1.vm.network "private_network", ip: "192.168.56.70"
    test1.vm.network :forwarded_port, guest: 22, host: 3333
    test1.vm.hostname = "test1"
  end
end
Vagrantfileの準備ができたらいよいよ仮想マシンを作成します。
PS C:\Users\sssmg\vm\test1> vagrant up
Bringing machine 'test1' up with 'virtualbox' provider...
==> test1: Importing base box 'centos/7'...
==> test1: Matching MAC address for NAT networking...
==> test1: Checking if box 'centos/7' version '2004.01' is up to date...
==> test1: Setting the name of the VM: test1_test1_1647669798130_24290
==> test1: Clearing any previously set network interfaces...
==> test1: Preparing network interfaces based on configuration...
    test1: Adapter 1: nat
    test1: Adapter 2: hostonly
==> test1: Forwarding ports...
    test1: 22 (guest) => 3333 (host) (adapter 1)
    test1: 22 (guest) => 2222 (host) (adapter 1)
==> test1: Running 'pre-boot' VM customizations...
==> test1: Booting VM...
==> test1: Waiting for machine to boot. This may take a few minutes...
    test1: SSH address: 127.0.0.1:2222
    test1: SSH username: vagrant
    test1: SSH auth method: private key
    test1:
    test1: Vagrant insecure key detected. Vagrant will automatically replace
    test1: this with a newly generated keypair for better security.
    test1:
    test1: Inserting generated public key within guest...
    test1: Removing insecure key from the guest if it's present...
    test1: Key inserted! Disconnecting and reconnecting using new SSH key...
==> test1: Machine booted and ready!
==> test1: Checking for guest additions in VM...
    test1: No guest additions were detected on the base box for this VM! Guest
    test1: additions are required for forwarded ports, shared folders, host only
    test1: networking, and more. If SSH fails on this machine, please install
    test1: the guest additions and repackage the box to continue.
    test1:
    test1: This is not an error message; everything may continue to work properly,
    test1: in which case you may ignore this message.
==> test1: Setting hostname...
==> test1: Configuring and enabling network interfaces...
==> test1: Rsyncing folder: /cygdrive/c/Users/sssmg/vm/test1/ => /vagrant
作成した仮想マシンの状態を見てみます。
PS C:\Users\USER\vm\test1> vagrant status
Current machine states:

test1                     running (virtualbox)

The VM is running. To stop this VM, you can run `vagrant halt` to
shut it down forcefully, or you can run `vagrant suspend` to simply
suspend the virtual machine. In either case, to restart it again,
simply run `vagrant up`.
仮想マシン(test1)のステータスが「running」になっているかと思います。
この状態が仮想マシンが起動している状態です。
その他の状態も以下にリストしておきます。
| 起動中 | running (virtualbox) |
| 停止中 | poweroff (virtualbox) |
| 異常 | aborted (virtualbox) |
仮想マシンにアクセスします。
PS C:\Users\USER\vm\test1> vagrant ssh
Last login: Sat Mar 19 10:20:56 2022 from 10.0.2.2
[vagrant@test1 ~]$
Vagrantfileで指定したホスト(test1)の仮想マシンにアクセスすることができたら成功です!
最後に仮想マシンの使用が済んだらきちんと停止してあげましょう。
停止しないままにPCをシャットダウンとかするとaborted となって別途対処が必要になります。
それではアクセスした仮想マシンからログアウトします。
[vagrant@test1 ~]$ exit
logout
Connection to 127.0.0.1 closed.
PS C:\Users\USER\vm\test1>
仮想マシンを停止します。
PS C:\Users\USER\vm\test1> vagrant halt
==> test1: Attempting graceful shutdown of VM...
再度起動する際は以下のコマンドを打ってください。
PS C:\Users\USER\vm\test1> vagrant up後は仮想マシンにアクセスするだけになります。
以上、Linux仮想マシンの作成でした。
それでは!
追記
Vagrantの操作、エラーに関してはこちらを参照ください。
・【 Vagrant 操作関連】コマンド、ステータス、スナップショット
・【Vagrant エラー対応】 備忘録
